----------------------AND IT BEGINS--------------------------
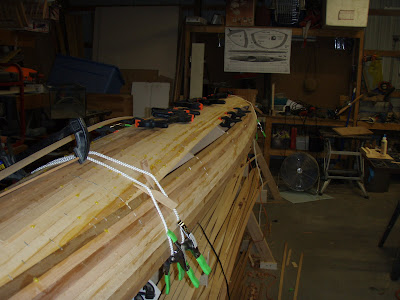
The striping has begun. I attached the first strip along the shear line, first just taking it place. When I liked the way it looked I added a staple at every station. 'A staple'? yes, after the hull is fully striped the staples will be removed, glue cleaned up, a good sanding with 60 grit in the random orbit sander. Then I will soak the hull with water, the water will make the grain raise reducing the sanding marks and making the holes from the staples swell a little reducing their appearance. The staples are what holds the strips in place, all the stations will be removed later.
more pics of the striping. I have elected to do to 2 dark strips, the 3 light strips then back to dark strips. I may introduce a thin light strip in between dark strips further on down the hull.. Not sure, we'll see what the wood wants to do.
Making good progress. Pretty happy with the way it looks so far. Just glad you start on the hull first, since you get to stare at the deck the entire time your in it. :)
Making progress....... You can see the small section I just had to sand up a bit to see how it's gonna look. I like it.
Problem though..... I have ran out of strips for the hull, the strips I have left are for the deck. UGH!!!!
I got tired of stripping so I decided to try laminating the stern strips. Couldn't really see all that well to make sure my lamination's are tight. Keep your fingers crossed!!
Ropes removed, not to bad, I have 2 gaps. Dont know if I like the way it looks, may need to remove it and try again. Maybe using dark boards.
Closing the 'football'..... Its getting exciting.... :)
Adding glue to the last strip on the hull.
Putting the strip in place......
Finishing up.....
From the stern....
From the bow......
First sanding....80 grit, I have a lot of sanding to do!! Yikes
Only the right side is sanded
I just couldn't wait, had to wet it down to see what it will look like after it is glassed. I LIKE it!!! The dark strips really pop. I took the stern cap off, I didn't like it, the gaps just would not do. I will try doing it with dark strips next and take a little more time to make sure I get a nice good tight glue line.
View from the Bow after a good wet out. The water will help raise the grain and hopefully help close up the staple holes a bit.
final sanding done!! That was a lot of sanding but I think it will be worth it. (hope it was enough)
I replaced the stern cap, took more time to do it and it turned out nice this time. Used the darker board this time and it looks good.
Close up of the hull after final sanding. I think it looks pretty good for my first stripper.....
***GO TO THE GLASSING TAB FOR GLASSING OF THE HULL, THEN COME BACK HERE FOR STRIPPING OF THE DECK.
Hull removed from the brackets and flipped over. I used old towels to act as a craddle so I dont dent or scratch the epoxy. I have cleaned up the rough fiberglass that was overhanging the sides and smoothed it out.
Starting to strip the deck.
strips from the stern...
making good progress.....
Very interesting, cool looking color variation. Cant wait to see what this will look like when its finished!!!
Looking as if I were sitting in the cockpit.. I like it!!
Stern stripping....


 P
P


No comments:
Post a Comment